Monday, October 15, 2012

Basic Crepes


It's amazing how something so simple can taste so, so good. Peanut butter and honey, a fresh peach, corn on the cob… I could go on. But one of the simplest is the humble crepe. The wonderful thing about crepes – well, actually there are several wonderful things about crepes:

·         You can prepare them the day before.
·         They use up extra eggs.
·         You can cook them in about a minute.
·         You can fill them with whatever your imagination suggests – ice cream, ham, cheese (any kind), whipped cream, asparagus, chicken, artichokes, chocolate, bananas, peanut butter, nutella,  crab, mushrooms, spinach, strawberries, potatoes… again, I could keep on going.  

While we were elk hunting, I had some eggs, it was Sunday morning, and I wanted something yummy. So we had: 

Basic Crepes (I got this from a delightful cookbook called The Fresh Egg Cookbook: From Chicken to Kitchen by Jennifer Trainer Thompson)

5 eggs
2 tablespoons water
1 tablespoon flour (my addition – we were at 9,000 ft. in elevation and I figured it couldn’t hurt)
1 tablespoon butter 

These eggs are so fresh - the yolks are almost orange. You'll also note there are 7 eggs in there, but they are small.

Beat the eggs, water, and flour with a whisk.
 
Note the wonderful old egg beater - it's one of the best ones I've ever used.
Melt some butter in the crepe pan or a skillet.
 
 
It will take about 2 ½ tablespoons of the egg mixture for each (use a ¼ c. measuring cup and don’t fill it all the way). Pour into the pan, tip the pan quickly and swirl around. This will take some practice, but it’s ok – you can eat the funny looking ones too.
 
 
Turn with a spatula and cook briefly on the second side.
 
They are incredibly tender and tear easily. Again, it's ok, you're just going to eat them.
 
Stack the crepes as they’re ready. This should make about 8 crepes.


Fill with whatever strikes your fancy or just butter, sprinkle with powdered sugar, roll ‘em up and eat as many as you want. They’re good for you!

Sunday, October 14, 2012

Green Tomato Tarte Tatin


I hope you still have some green tomatoes because, if you do, you’re in for a treat. If you don’t maybe someone you know has some green tomatoes. Regardless, this is one of the best green tomato recipes I’ve ever tried. It has lots of complex flavors, is relatively simple to make, and uses up green tomatoes. And your kitchen smells wonderful while it’s cooking!

I found the recipe on:


Green Tomato Tarte Tatin

Based on the classic French dessert, this savory tarte tatin is a wonderful setting for fall's green tomatoes.

Makes 4 to 6 servings (Well, it should have made 4-6 servings, but we were greedy and two of us ate the whole thing. My stomach complained about stuffing it. But it was worth it!)

Crust
1 1/2 cups all-purpose flour
1 teaspoon salt
1/2 teaspoon baking powder
6 tablespoons frozen butter
1 large egg
About 1/4 cup ice water

Tomatoes
4 or 5 green tomatoes (firm but with a bit of give when you press them)
3 tablespoons salted butter
2 tablespoons dark brown sugar
1 shallot, minced fine
2 teaspoons fresh thyme, or 1 teaspoon dried
1 tablespoon balsamic vinegar
1/2 cup white wine
Salt and pepper to taste 

For the crust, in a large bowl combine the flour, salt and baking powder. Grate in the butter and mix with a fork until texture is crumblike. Break in the egg and stir well. Knead with your hands, adding just enough ice water to pull it all together into a workable ball. Knead for about a minute, to be sure the egg and butter are well incorporated. Wrap in foil or plastic, and store in the refrigerator until you're ready to use it, at least a half-hour. 

Preheat oven to 400 degrees. 

In a 9-inch skillet with a metal handle, melt butter over medium heat. Add the sugar and stir until melted. Add shallot and thyme (if you're using dry).
 
 
Cook until butter starts to brown and the sugar seems almost caramelized — about 5 minutes. Add the balsamic vinegar and white wine, and whisk into a smooth broth. Be sure to scrape all the good flavorful bits from the bottom of the pan.

Cook 5 or 10 minutes on a slow boil until the sauce is reduced and syrupy. 


Meanwhile, cut the tops off tomatoes. If tomatoes are very juicy or seedy, give them a gentle squeeze to drain a bit. Cut the tomatoes lengthwise in half. Place them cut side down on the cutting board and cut them into wedges, angling your knife around the curve of the tomato. 


Carefully transfer the sliced tomatoes to the pan in a pretty pattern, fanning the slices out as you do so, so that they lie more flatly against the sauce and the bottom of the pan. If using fresh thyme, sprinkle it over the tomatoes. 


Turn the heat down to medium-low, cover the pan and cook about 10 minutes. You want the tomatoes to be soft but not falling apart. How long you cook will depend on the ripeness and variety of the tomatoes. Try not to stir the tomatoes, although you can give them a little nudge or shake the pan slightly if they seem to be sticking. 

Remove the lid and continue to cook 5 to 10 minutes, until the pan is fairly dry, and the sauce is thick and syrupy. Season with salt and pepper. 


Roll the pastry to be just bigger than your pan. I like this pastry a little thicker than usual tart dough — maybe 1/3-inch thick. 

While the mixture is still warm from the stovetop, carefully place the dough over the tomatoes, tucking the sides in all around and folding them so they're a bit thicker than the rest of the dough. Prick the dough in a few places with a fork or knife. 


Bake about 25 minutes, until the top is golden brown and the juices are bubbling out from under the sides of the pastry. 


Allow to cool a few minutes, then very carefully turn onto a plate. Any pieces of tomato or juicy bits of sauce that get stuck to the top can be scraped off and added to the top of the tart.


This is really so SO good! Enjoy!


Thursday, October 11, 2012

Thick-Cut Pork Chops


I know, I know – I’ve been such a slacker this summer. I haven’t touched this blog page for months. That’s what happens when you make your garden bigger – you run out of time to blog about the garden!

We had an okay year – not great – because of the drought. Carrots, lettuce, spinach, chard, onions, pumpkins, corn, peppers, and pole beans were all a success. Tomatoes and potatoes were not. Our potatoes got some sort of fungus that makes the potato look like it has warts. I found I could peel the potatoes and they were fine underneath the skin – for the most part. Some of the potatoes were affected all the way through the potato so they went out to the compost. We learned that we have to forego planting potatoes for about three years. So sad – I do love those new baby potatoes.

And the tomatoes were just drought stressed no matter how we watered them. The tomato crop was about half what it usually is. It was interesting that the tomatoes and peppers were planted in the same garden – the south side of the house – and that the peppers did SO well and the tomatoes didn’t. We did get a lot of cherry tomatoes – they did great. And cherry tomatoes are wonderful roasted in the oven with some olive oil, garlic, salt and pepper. I got some wonderful marinara sauces out of the cherry tomatoes.

But today's blog is not about the garden – it’s about cooking! While we were elk hunting, a wonderful friend gave me a copy of Cook’s Illustrated All-Time Best Recipes. There are some fabulous basic recipes in this magazine, so over the next few weeks, we’ll try out a lot of their recipes.  

Let’s start with pork chops. We bought half a pig from a friend who raised it for 4-H, and decided to try the first package last night. I’ve always either fried pork chops or put them in a slow cooker with some sort of sauce. The problem with pork chops is that they dry out. So you’re eating these leathery slabs of meat if you fry them, or lose some of the flavor if you put them in a sauce.

Not any more! This recipe takes a little while, but these pork chops are moist, flavorful, and simply delicious! You can go to http://www.cooksillustrated.com if you want more information about the whys and wherefores of this recipe.

THICK-CUT PORK CHOPS
4 (12 oz.) bone-in pork rib chops, 1 1/2” thick, trimmed
Kosher salt and pepper
1-2 tbs. vegetable oil 

Pat chops dry with paper towels. Cut 2 slits, about 2” apart, through outer layer of fat and silverskin on each chop. Sprinkle each chop with 1 tsp. Kosher salt. Place chops on wire rack set in rimmed baking sheet and let stand at room temperature for 45 minutes (make sure it’s for the whole time)
 
See the little slits on the side?

Adjust oven rack to middle position and heat oven to 275 degrees. Season chops with pepperH; transfer baking sheet to oven. Cook until chops register 120-125 degrees, 30 to 45 minutes.


Heat 1 tbs. oil in a sturdy 12” skillet (this is where cast iron is invaluable) over high heat until just smoking. Place 2 chops in skillet and sear until well browned and crusty – 1 ½ to 3 minutes – lifting once halfway through to redistribute fat underneath each chop. (Reduce heat if browned bits start to burn.) Using tongs, turn chops and cook until well browned on second side – 2-3 minutes. Transfer chops to a plate and repeat with remaining 2 chops, adding more oil if pan is dry.


Reduce heat to medium. Use tongs to stand 2 chops on their sides. Holding chops together with tongs, return to skillet and sear sides of chops (with exception of bone side) until browned – about 1 ½ minutes.
 
 
Repeat with remaining 2 chops. Let chops rest, tented loosely with foil for 10 minutes.


You can make this sauce if you want (I did) and it’s delicious! Note: have the garlic and shallot cut up and the broth measured because it goes fast after the chops are done.

GARLIC AND THYME PAN SAUCE
1 large shallot, minced (I used a small onion)
2 garlic cloves, minced
1 c. low-sodium chicken broth
1 tsp. minced fresh thyme
¼ tsp. white wine vinegar
3 tbs. unsalted butter, cut into 3 pieces and chilled
Salt and pepper 


While chops rest, pour off all but a teaspoon of oil from the skillet and return the pan to medium heat. Add shallot and garlic and cook, stirring constantly, about 1 minute.
 
 
Add broth and whisk or stir to loosen browned bits.
 
 
Simmer 6-7 minutes (I couldn’t wait – I brought it to simmer for about 3 minutes) until reduced to ½ cup. Remove from heat, add thyme and vinegar. Whisk in butter 1 tablespoon at a time.
 
 
Season with salt and pepper to taste.
 

Delicious! I served them with a spinach salad and some baked squash.

Thursday, May 24, 2012

The Tomato Garden

This has nothing to do with tomatoes or peppers or anything, but it's pretty.
This time of year is just crazy busy with getting the garden ready to plant, planting the garden and taking care of it once things are planted! We finally got the tomato/pepper bed ready and the tomatoes and peppers planted.

This garden is on the south side of the house so that the plants are protected from the wind and they get the benefit of reflected heat at night. The bricks heat up during the day, then release the heat at night to keep the plants warm.

We've added many, many wheelbarrow loads of compost to this bed over the years - at least a million loads - and it's starting to pay off. Years ago, we took out as much of the old dirt as we could and just add more compost every year.

So in the spring, Walt spades up the garden - it's lots better but still not great soil, so it's easier to loosen it with a shovel before tilling.


Then we cover it in compost, and till it in. We still have dirt clods, but they are smaller every year and the soil works up easier every year.


I adjust the drip lines. They are hooked up to a timer on a faucet. This way I can monitor the amount of water each plant receives.


Then I plant the tomatoes and peppers. This is always fraught with anxiety. The day I planted them, it was a blast furnace 90 degrees on that side of the house. The next day, it was a frigid 45 degrees. In Cheyenne, it can be 95 degrees on Memorial Day, or it can snow. So I take my chances. I can always cover them if it doesn't get too cold. And that actually helps cut down on the shock of transplanting - to have it a bit cooler after they are planted.

I started all the tomatoes and peppers from seed in the house back in March. I've found, over the years, that I really like individual peat pots. I tried coir pots this year, and they are ok, but I wasn't that impressed. So I'll stick with peat pots. Then I use a grow light and keep it on from early morning to late evening. The plants are also in a big sunny window so they get lots of light.

Still, the plants get pretty leggy by late May, so I'm anxious to get them in the ground. I'm also anxious to reclaim the sun room.

I plant the tomatoes right up next to the trellis then tie them with green plant ties - the plastic kind, not metal. I put the tomatoes fairly close together. They always do well and we get from 100 - 150 pounds of tomatoes every year. I always start more tomatoes than I can possibly plant - the gardener is ever optimistic, as you know - because I want to try so many varieties. I've tried everything from your basic Early Girl (which do well) to more heirloom varieties like Brandywine, Paul Robeson, Black Truffle. They've always done well too.

Then the peppers go in front of the tomatoes. Again, I start way more than I have room for, but I love peppers and we eat them all. Peppers need lots of hot weather to grow. I plant everything from beautiful purple mild Island peppers to nice hot Serrano. The hotter the pepper, the longer they take to grow. So it's dicey to plant Serrano or Jalepeno peppers in Cheyenne, but we usually get lots of them.

Notice that the peppers are tied to a stake. That's to protect them from the Cheyenne wind. Which only blows in July, March, September, May, February, June, October, and August. And it blows at some other times too.
In front of everything goes cilantro. Of course! If you plant tomatoes and peppers, you need cilantro to make fresh salsa and pico de gallo. Cilantro can be grown anywhere. Really. And it sends little seeds out everywhere. You can toss out a bunch of seeds in the fall and have cilantro early in the spring. We've already been picking cilantro from some volunteer plants from last year.

I also put in some marigold seeds to give the garden some color in the late summer.

After planting everything, I mow the lawn with the grass catcher on. Then I mulch around all the new plants - this helps the roots stay cool, keeps down the weeds and conserves moisture. Like I say - it gets pretty warm by that brick wall all day. And notice the little boards in the garden? Those are to stand on so I don't stand on the soil. I don't want to compact the soil around the plants, so the little boards come in handy for picking tomatoes, or tying them up as the summer goes along.


I love fresh, plump, red, juicy, tart or sweet, full of flavor homegrown tomatoes. So all this work is well worth it!

These are from last August.


Friday, April 27, 2012

Oatmeal-Date-Chocolate Cookies


I needed to use up some dates, and I needed some cookies, and I needed something with chocolate. These turned up on a Google search and they are delicious! Chewy, healthy (sort of) and yummy! Next time, though, I'll throw in about 1/2 cup of pecans because I like nuts in my cookies. I also doubled this recipe and it made a full gallon ziploc of cookies.


Oatmeal-Date-Chocolate Cookies
6 tablespoons unsalted butter
3/4 cup packed light brown sugar
1/3 cup all-purpose flour
1/3 cup whole-wheat flour
3/4 teaspoon baking soda
1 1/2 cups regular oats
1/2 teaspoon salt
1 lightly beaten egg
1 teaspoon vanilla extract
1 cup chopped pitted dates
3 ounces coarsely chopped bittersweet chocolate

This is an easy way to chop dates.
Preheat oven to 350ยบ. Melt butter in a small saucepan over low heat.

I microwaved it.
Remove from heat and add brown sugar.


Stir until smooth.


In a medium bowl, combine all-purpose flour, whole-wheat flour, baking soda, oats, and salt.


Combine the butter mixture with the dry ingredients,


and add egg, vanilla,


and chopped dates. Fold in bittersweet chocolate.


Mix well and spoon mixture by tablespoon-fulls out onto lightly greased (or silicone baking mat–covered) baking sheets.


Bake for 12 minutes, until tops are dry to the touch. DO NOT overbake! I let one batch go 13 minutes and they turned a fairly dark brown. So we had to eat those immediately. That wasn't necessarily a bad thing.  About 32 cookies (more if you double it).

Enjoy!


Tuesday, April 24, 2012

Tomato Paste


About this time of year, I like to clean out the big freezer. We're usually down to just elk, antelope, and frozen tomatoes. Since I don't make too many soups or stews in the spring, I don't want all those frozen tomatoes to go to waste. After all, I started the plants from seed, nurtured them in the sun room, planted them, watered them, talked to them, picked them, and froze them last summer and fall.

So I make tomato paste out of them. Once they've been frozen, the skins just slip right off under warm water, then they cook all day and make the house smell wonderful. Now I can use the paste in spaghetti sauce, or on pizza, or in lasagna. Wonderful.


I had 7 quart bags of frozen tomatoes and they cooked down to 7 cups of tomato paste. It's easy to do:
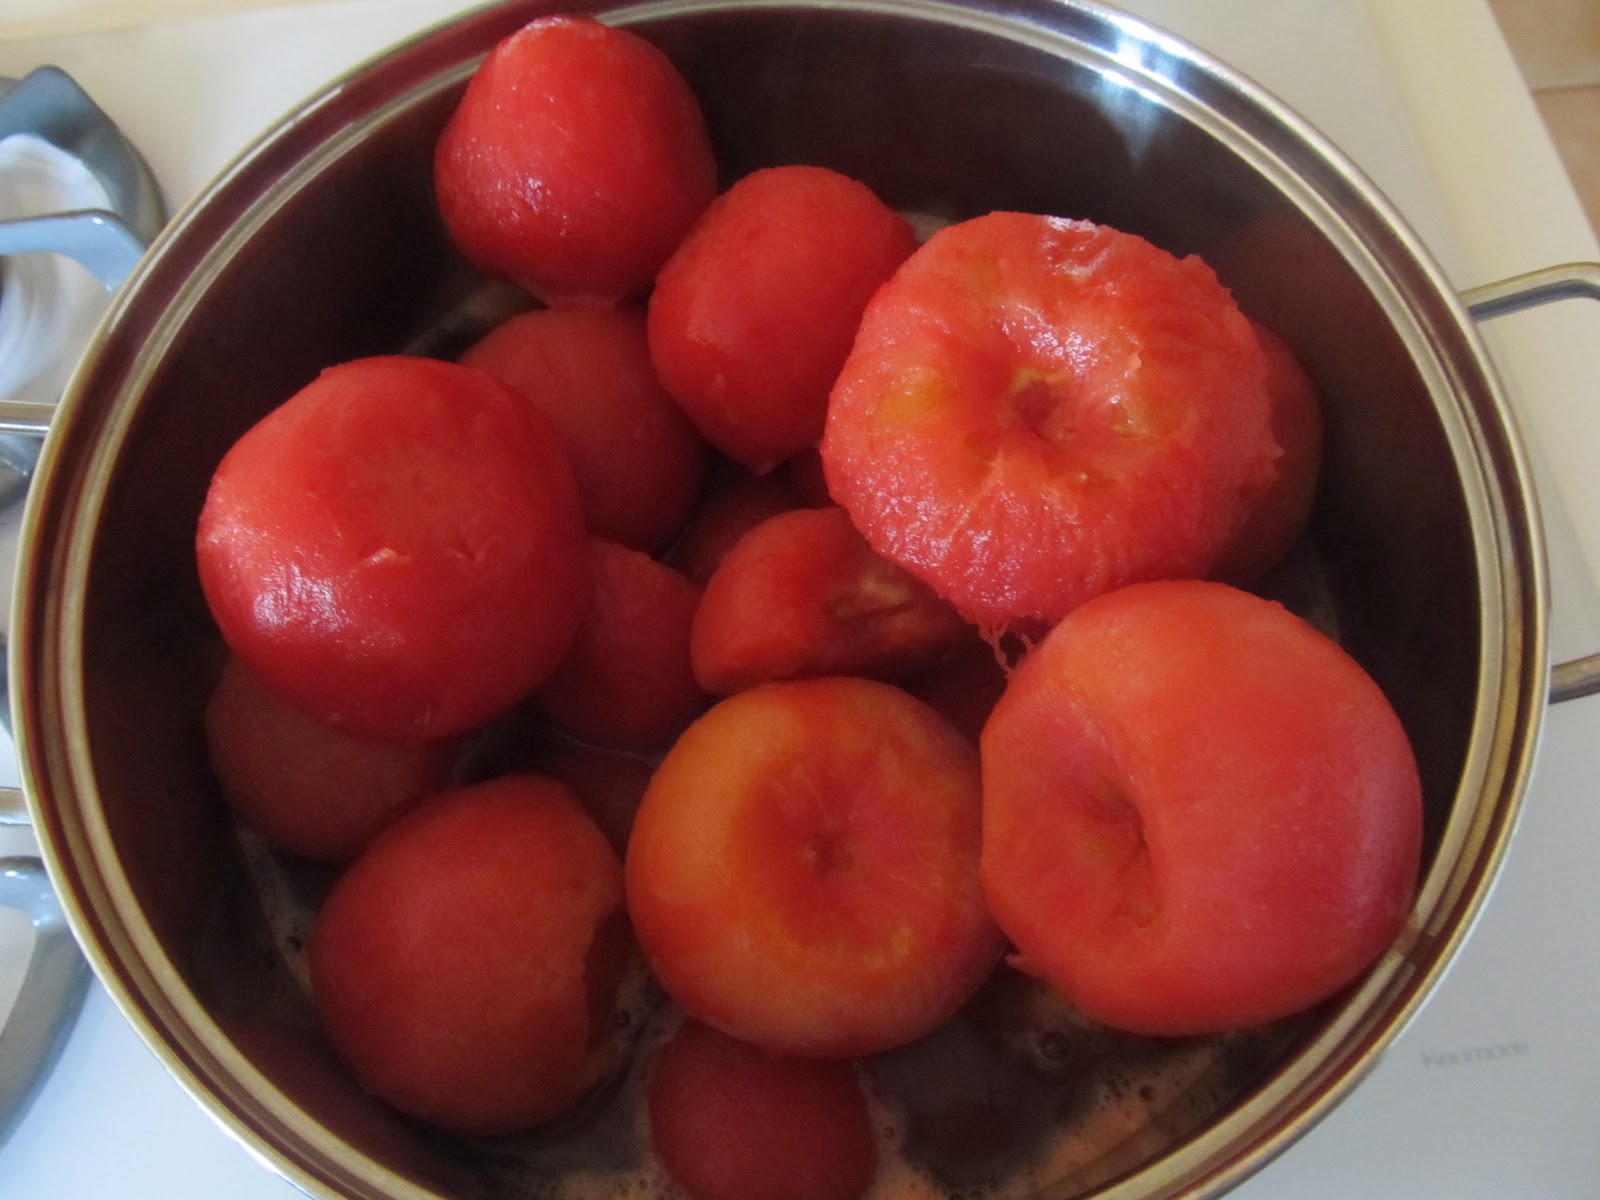
Frozen tomatoes - run them under warm water as the skins soften and slip off (see the first picture)


(or fresh if you want to peel them - dip the fresh tomatoes in boiling water for a minute or two. Drop into a bowl of cold water. Peel off the skins)

Place in a LARGE pot.


Turn on high until it comes to a boil.


Turn to low and simmer, stirring every 20 minutes at first, then stir more often as it thickens - about every 10 minutes at the end of the cooking time. Here's how it changes. Note how it cooks down.


This took several hours of cooking.

Cook until it's the consistency you prefer.
Don't add any salt or seasonings. Add those later when you make spaghetti sauce or pizza or whatever.

I put the sauce in freezer bags in 1 cup measurements.


Okay - now I'm ready for pizza!