Wednesday, August 31, 2011

Flowers and Edible Landscaping


Our garden is not a flower garden. I drive by beautiful yards full of flowers and experience momentary longing for lots of flowers. But ours is mostly an edible landscaping. We do plant some flowers, however.

In the spring, we have daffodils and grape hyacinth. 


We have some flowering trees – crab apple, chokecherries, and plums. In the summer, we have daisies and roses.


In late summer, we have Russian sage, sunflowers, marigolds and mums.


I have a few planters that I fill with annuals. I plant marigolds around all our garden beds. They are supposed to keep the pests down – I’m not sure that’s the case – but they do look lovely around the yard and gardens.


Most of these flowers attract bees. Bees have it hard enough right now, so the more habitat that’s provided for them, the better.


This year, I experimented with edible flowers and edible landscaping. It’s been a great success. We had an area in the front yard that just never worked. We tried perennials, we mulched them, and we tried digging things up and replanting. Nothing worked. It still filled up with weeds or grass. 

So we dug everything up (transplanted a few elsewhere) and hubby built three beautiful raised beds. We mulched around the beds with wood chips. I put some pretty wire trellises in the middle of each bed. Then I planted basil, red lettuce, spinach, Bibb lettuce, radishes (I planted a variety called Easter egg – purple, pink, white and red), carrots, Swiss chard (Bright Lights):


 peas, onions:

scarlet runner beans:

pansies, and nasturtiums.


It worked out great – we started eating salad greens in about 4 weeks after planting. Each bed produced an astonishing amount of vegetables. We had baby carrots, green onions, baby salad greens, and flowers. We found it’s wonderfully fun to eat flowers in our salad. Pansies are very mild, and nasturtiums are slightly spicy.

The scarlet runner bean flowers are not edible, but the beans are and they make a lovely backdrop to the rest of the garden. They are beautiful beds.


So next time you plant some lettuce, plant some edible flowers along with them – the bees love them and so will you.


Tuesday, August 30, 2011

Zucchini


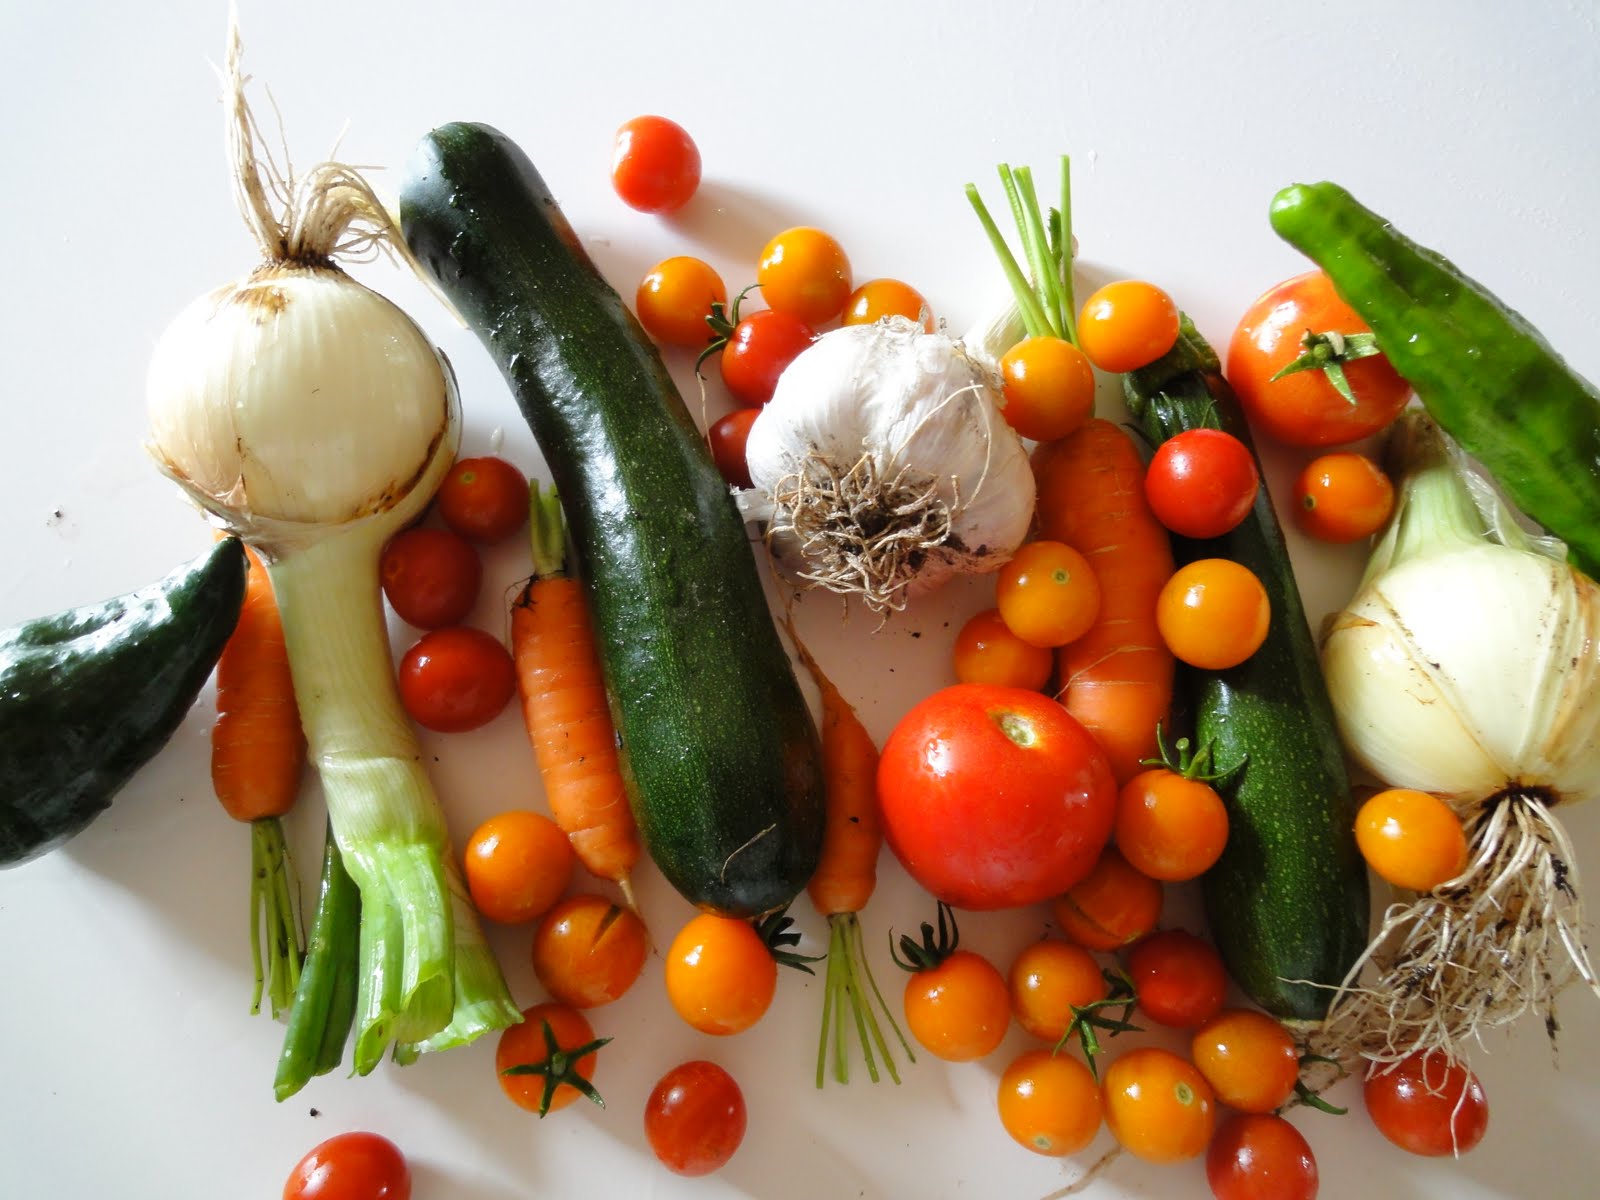
How, really how, do you use up zucchini? Pick often. Pick when they are small, and you have to check the plants every day because you’ll go out to the garden one day and there will be this cute little 4” zucchini and the next day it could be as big as the Hindenburg. And you can only make so much zucchini bread…
 
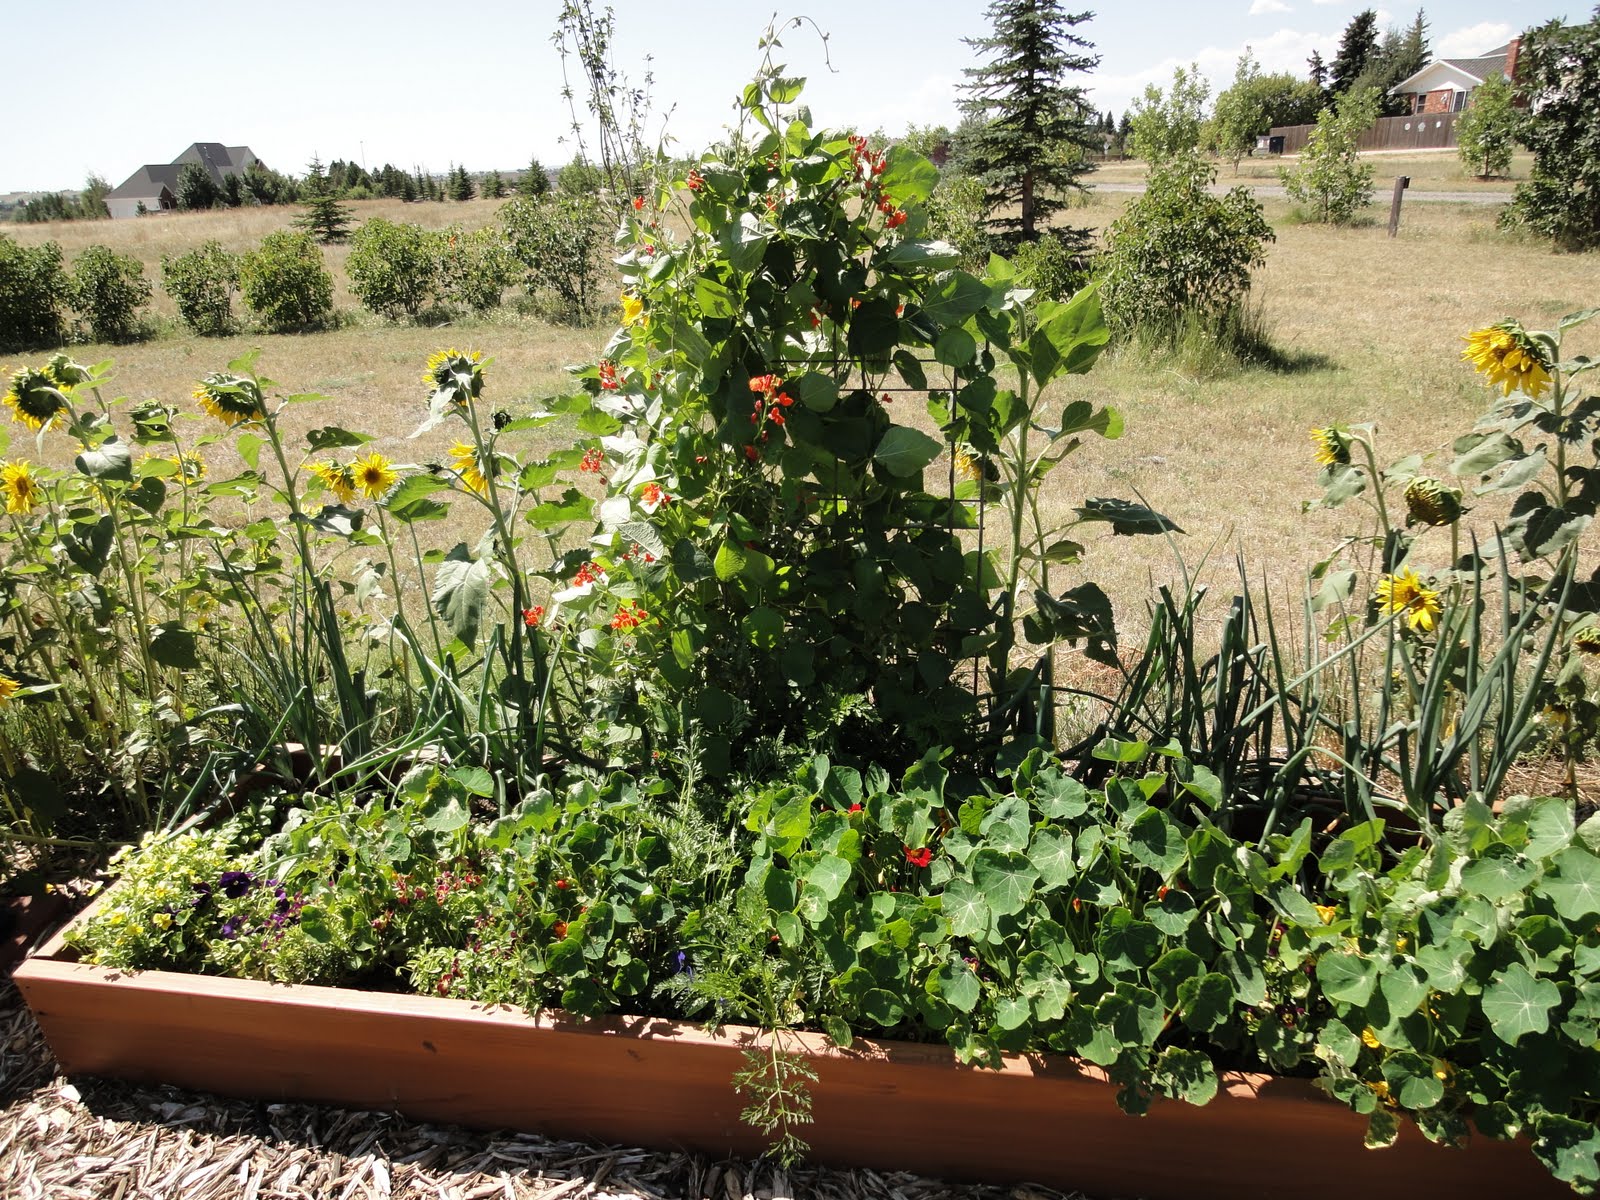
To plant zucchini – wait till it’s warm enough at night. In Cheyenne, that’s usually the first or second week in June. At first, I planted zucchini in our raised beds, but the plants just get too big. So I plant them in the big squash, corn, bean bed (more on that later). I make three hills about 3 feet apart and plant 3 seeds in each hill. Then I thin back to one plant in a hill when they all come up. They like to be watered and will produce about as long as I keep picking.
 
Then come the decisions about how to use the zucchini. Do I leave them on doorsteps hoping they will have a good home? I give away nearly as much as I use, so they are a most bountiful vegetable.
 
I pick them when they are about 6”-8” long. When they are this size, they are sweet and crisp. I let one get to 12” this summer so I could make zucchini bread, but that was an exception.
 
What do we do with them?
·         Slice them in rounds and put them in salads – they are nice and crunchy.
·         Slice them lengthwise, then quarter them, serve with carrot sticks and dip in salad dressing.


·         Slice lengthwise in half, brush with olive oil, sprinkle with a bit of salt and some dried herbs, and grill about 5 minutes on a side.
·         Slice in rounds, slice an onion, mince some garlic and sauté in olive oil. Add some pesto at the end.


·         Make zucchini bread or muffins or cookies.
·         Make: 
ROASTED GARDEN VEGGIE MARINARA
Pick some tomatoes
Zucchini
Carrots
Onions
Garlic
Peppers
Anything else you can think of
Kosher salt
Fresh ground pepper
Basil
Parsley


You want enough to load a cookie sheet with vegetables. Pour some olive oil on the baking sheet -enough to coat the pan. Cut everything up into 1”-2” pieces and put all the vegetables on the baking sheet. Drizzle some more olive oil over the veggies. Sprinkle with salt and pepper.


Put in a 325° oven and stir every 20 minutes for about an hour. Add some chopped herbs.


Your kitchen smells heavenly by this time – the garlic, the tomatoes, the roasting. You could be in Tuscany. Maybe put some Italian opera on the iPod. Then stir the veggies, not the iPod, every 10 minutes till everything is very soft. Remove from the oven and let cool a bit. Put the roasted veggies in a food processor and process till mostly smooth. I got about 4 cups from this batch.


Serve this over pasta for instant spaghetti sauce. Or put in freezer bags to use in the winter when you want some summer food. Or spread on pizza dough for a fabulous pizza topping. Kids love it and they don’t know they are eating all those different veggies. Put some fresh mozzarella on top and it’s so wonderful.
 
This is another recipe I found on the National Public Radio website. You can use nearly any vegetable, but it works nicely with grated zucchini. I’ve used spinach or swiss chard too.

 SOUFFLE WITH VEGETABLES
Try to make sure the eggs are as fresh as possible to ensure that beautiful puffy rise in the oven. Many seasonal vegetables will work here, but try not to overwhelm the soufflé — less is more. This tastes delicious alongside wilted greens or with a big salad.
3/4 to 1 cup chopped scallions
1 cup heavy cream
1 thyme sprig
Assortment of vegetables, finely chopped
4 tablespoons unsalted butter
4 tablespoons all-purpose flour
1 1/2 cups whole milk
1 cup grated Parmesan cheese
1 teaspoon salt
1/2 teaspoon pepper
Chopped fresh herbs if you have them
4 large egg yolks
6 large egg whites
Preheat the oven to 375 degrees. Butter a 6-cup soufflé dish and dust with a sprinkling of the Parmesan cheese.
Put the garlic, cream and thyme in a small saucepan over low heat. Bring slowly to a boil, then turn off the heat, cover and let steep for 10 minutes.

For the vegetables, I use whatever I have on hand although some will work much better than others. Try a combination of finely chopped spinach and red bell pepper, or roast a butternut squash and mash it well before folding into the batter. If you're using vegetables such as garlic, mushrooms or greens, sauté in 2 tablespoons of olive oil in a frying pan over medium heat for about 5 minutes until soft, then set aside.
Melt the 4 tablespoons of butter in a saucepan and stir in the flour, whisking, over low heat. Cook for one minute while whisking slowly. Whisk in the milk and stir until it thickens. Turn off heat and stir in the Parmesan, salt, pepper, herbs, egg yolks, vegetables and cream mixture.

In another bowl, beat the egg whites with a whisk or a hand mixer until they form soft peaks. Gently, fold the whites into the base and scrape the batter into the soufflé dish. Bake until golden brown and set, about 30 minutes. Serve immediately.
I know this has lots of steps but it looks incredibly impressive when it comes out of the oven. And it’s delicious.


Or for desserts, there are these two. Again, no one has to know they are eating vegetables if you don’t want them to know it. The first one is just fabulous and, if you heat a piece in the microwave for about 15 seconds, it’s just like eating chocolate molten cake. You will soon learn that I love chocolate. We’ll do a chocolate page later, too.


CHOCOLATE, CHOCOLATE CHIP ZUCCHINI CAKE
Read more about it at www.cooks.com/rec/view/0,171,147185-225193,00.html
Content Copyright © 2011 Cooks.com - All rights reserved.
1/2 c. soft butter
1/2 c. oil
1 3/4 c. sugar
2 eggs
1 tsp. vanilla
1/2 c. sour milk
2 1/2 c. flour
4 tbsp. cocoa
1 tsp. baking soda
1/2 tsp. cinnamon
1/2 tsp. cloves
1/2 tsp. salt
2 c. grated zucchini
1/4 c. chocolate chips
1/4 c. chopped nuts

Cream butter, oil, and sugar together; add eggs, vanilla and sour milk. Blend thoroughly. Sift together flour, cocoa, soda, cinnamon, cloves, and salt. Blend with creamed mixture. Stir in zucchini. Spoon into greased and floured 9 x 13 x 2 inch pan. Sprinkle with chocolate chips and nuts. Bake in a preheated 325 degree oven 45 minutes or until done.

 This next one is about as healthy as you can get – I love that it’s made with olive oil (trust me on this) and honey. Again, heat a piece in the microwave and it’s wonderful. I want some now.

 DOUBLE CHOCOLATE ZUCCHINI BROWNIES
2 c. grated zucchini
½ c. olive oil
½ c. honey or agave nectar
2 eggs
1 tsp. vanilla extract
1 ¾ c. whole wheat flour
½ c. unsweetened cocoa powder
½ tsp. salt
1 ½ tsp. baking powder
½ tsp. cinnamon
1 ½ c. semi sweet chocolate chips 

Preheat oven to 350°. Grease an 8x8” baking pan and line with parchment paper (I did this both times I made the brownies and it seems to work). Grease the parchment paper.

Press the zucchini with a paper towel to remove excess moisture. Fluff with a fork. In a large bowl, beat together oil, honey, eggs and vanilla. Stir in zucchini. In another bowl, sift or stir together the dry ingredients. Add dry ingredients to the zucchini mixture. Stir to combine. Add chocolate chips. Pour into prepared pan. Bake 30-40 minutes or until a toothpick inserted in the center comes out clean. Let cool completely. Remove from pan using the parchment paper. Serve chilled for a fudgy brownie or warmed for a gooey, cakey brownie.


You probably have some other zucchini recipes, but these can get you started. Enjoy!

Monday, August 29, 2011

Mozzarella


When the tomatoes come on, it’s time to make mozzarella. I know – you can buy it at the store and can even buy some specialty varieties. However, mozzarella is easy to make once you buy the supplies. More than that, it’s smooth, creamy, rich, melts beautifully, and you can experiment with all sorts of flavor combinations at home.

I’m not going to go through all the steps to make the actual mozzarella – you can get the supplies and instructions from any cheese making supply website. I get mine from the one on the right – the New England Cheesemaking Supply Company. And they have wonderful instructions on making the mozzarella.


Some things I’ve learned:
·         Get some Lipase Powder. It adds a nice Italian cheese flavor. You can make the mozzarella without it, but I think it tastes better with the Lipase.
·         You can use 2% milk, but I like whole milk better. It makes a creamier cheese.
·         Use a big stainless steel pan to heat the milk – a gallon of milk needs lots of space.
·         Use some gloves like Playtex, not thin latex ones, to stretch the cheese. It gets pretty hot.
·         It takes only about half an hour to make the cheese, but you can’t walk away once the milk is heated, which doesn’t take long.
·         Divide after the final stretch into two or three balls, wrap in plastic wrap. That way the others stay fresh while you use one at a time.
·         The best part - you can eat the mozzarella immediately! And I do. Yes, I do.


The fun comes when you stretch the cheese for the last time. Now you can do all sorts of wonderful things with it:


While it’s still warm, divide in thirds. Pat out each of the balls till it’s fairly thin. Put on a layer of basil leaves and roll it up like cinnamon roll dough. Wrap in plastic wrap, chill till set and slice.


Before you make the cheese, roast some garlic (I’ll talk about how in the garlic section later). When the garlic is soft, mash two or three cloves. When you do the final stretch on the cheese, add the mashed garlic and incorporate it into the cheese. See the little tiny flecks of garlic?


Of course, you can leave it plain and put it on homemade pizza. It melts into a creamy smooth topping. 

I like to make little balls and marinate them: 

Marinated fresh baby mozzarella cheese balls
·      1 Tablespoon fresh parsley, coarsely minced
·      1 Tablespoon fresh basil, coarsely minced
·      1 Tablespoon fresh oregano, coarsely minced
·      1/2 cup good quality olive oil
·      2 teaspoons lemon juice
·      1/4 teaspoon salt
·      1 pound fresh baby mozzarella cheese balls

Place parsley, basil, oregano, olive oil, lemon juice, and salt in a zip-top bag large enough to hold the mozzarella. Squish to combine. Add the mozzarella, seal, and toss bag to coat the cheese. Open the bag, squeeze out all the air, and re-seal.

Let marinated mozzarella balls sit at room temperature for 4 hours before serving. That’s if you can stand to wait that long.


Then, this is what mozzarella is really for: Caprese. In fact, this is what summer is for. In fact, that’s what we’re having for dinner tonight. Maybe for breakfast.


CAPRESE
1-2 ripe tomatoes
Basil leaves
Fresh mozzarella
Olive oil
Balsamic vinegar 

Slice the tomatoes in thick slices. Do the same with the mozzarella. Layer them alternately on a plate. Slip the basil leaves between the layers. Drizzle with olive oil, then the vinegar. You can reduce the balsamic vinegar before drizzling if you want.

Pioneer Woman’s blog (see the link on the right) has some great instructions and pictures for this salad. 

A ball of fresh mozzarella makes a great gift and is easy and inexpensive to make. Enjoy!


Sunday, August 28, 2011

Soy Beans


These are not the rock stars of the garden. They quietly grow, adding nitrogen to the soil, until all the pods are ready to pick about the same time. You plant them like any other bean – a couple inches apart, then thin them if necessary. I planted them in the same raised bed as the bush beans and the sugar snap peas. Next year, I’ll plant the potatoes in that raised bed because of all the nitrogen the beans and peas add to the soil.

We picked them yesterday  – pulled up plants and all. Then I made edamame. We had enough to eat ourselves sick, and freeze two bags for later.

EDAMAME
1 lb fresh edamame in pods, or frozen edamame in pods
2 Tbsp or more Kosher salt  
Wash soy beans in a bowl of water. Cut off the stem end of each pod. This could take forever. Turn on some tunes and sing, practice number games in your head, something.

As you cut off each end, put in the pod in another bowl and salt each layer with Kosher salt.  (If you are using frozen edamame, start from the next step.) Boil lots of water in a large pot. Add about 2 Tbsp of salt in the boiling water. Put edamame in the boiling water and boil for 3 to 4 minutes, or until softened. Drain edamame in a colander. Taste one edamame and if it's not salty enough, sprinkle more salt over boiled edamame. Spread the edamame on a flat tray to cool. Then eat them till your blood pressure shoots up from all the salt.


Saturday, August 27, 2011

Potatoes


Potatoes have gotten a lot of bad press lately: supposedly, they pack on the pounds over the years. But really – nothing beats a freshly dug new potato. They are creamy and mild. Dig them up, wash them and plop them in a pot of boiling water. Drizzle them with butter and sprinkle with pepper and salt... I know, I know – your arteries clog at the thought and it’s your cardiologist’s nightmare. But this is one of the treats of the summer.
Yesterday, we finished digging the spuds. It was hot, so we got outside early in the morning. This is so the potatoes don’t get exposed to the sun and build up toxins in the skin. This year, we planted two varieties – Red Norland and Yukon Gold. Last year, the Yukon Golds did better; this year, the Red Norlands did.  
We start with raised beds – one is 3’x12’ and the other is about half that size – and add the growth medium. I’ll talk about that another time. We use a Netafim drip irrigation. I’ll talk about that another time too.  
We only use certified seed potatoes. Even so, a couple of our Yukon Gold potatoes had spots of fungus. After doing a bit of research, I learned that I should rotate my potato beds and only plant potatoes in the same place every 3 or 4 years. And that I should plant beans or something in the potato bed from last year. Now I find out. That’s the wonderful thing about gardening – I learned something new and next year will be different! 
When we got the seed potatoes, we took them out of the little bag they came in. The night before we were ready to plant, I cut each potato into 3 or 4 pieces depending on its size. You want an “eye” or two in each piece. I let them sit overnight after cutting them.  

The next morning, we tried two different ways of planting. We took most of the soil out of the bed the Yukon Golds were to go in, and planted the little potato pieces. I put them about 12” apart and line the rows up with the Netafim. When the potato plants get about 12” high, we add the rest of the soil (sitting on a tarp off to the side) to hill up the plants. 

For the Red Norlands, we made a trench for each row, and put the potato pieces in the trench. By doing it that way, there wasn’t as much soil to hill them later, but it didn’t seem to matter. The Red Norland bed was about 3’x6’ and we still got a lot of potatoes from that bed.  

We got about 30 lbs. of Red Norlands and about 40 lbs. of the Yukon Gold. After digging them, we put them on a mesh table on our deck. It’s under the eaves, so it’s shady all day. We wash the potatoes, enough to get off most of the dirt. Then let them dry and cure for a couple of days. If it looks like it’s going to rain, I cover them with a tarp till the rain passes by. Which, in Cheyenne, the rain usually does pass by instead of raining and cooling things off. 

Oh, back to potatoes. When they are cured, I put them in little open bins and put them on the basement cement floor in our food storage room. They last several months this way. They are so incredibly crisp and mild when they are new and freshly dug. I use all the little marble-to-golf-ball size first, then work my way up to the biggest ones about Thanksgiving time.  

Thanksgiving. Mashed potatoes. Ree Drumond’s recipe for mashed potatoes. Check out her blog on my link.  

But there are other wonderful, many, many wonderful things to do with potatoes. You can roast them – slow oven, drizzled with olive oil and any kind of seasoning – for about 45 minutes. You can put them in salads. You can make hash browns, fried potatoes, French fries, baked potatoes, and … 

Three of our favorite ways to eat potatoes are all very simple: 

Choose new potatoes of the same size, wash them, place in boiling water till done – how long depends on the size. Some of the little baby ones only take about 5 minutes. Drain the water, add some butter to the pan and put the lid back on so the potatoes can steam and melt the butter. Sprinkle with salt, pepper, and some fresh herbs – parsley, or basil, or thyme, or whatever.

Here’s one our kids loved – it’s a great winter meal. Just add a salad, or not…

CHEESE POTATO SOUP
4 lg. potatoes
1/3 c. butter
1/3 c. flour
1 1/3 c. shredded sharp cheddar cheese (or pepper jack, or Monterey jack)
Diced onion, optional
Boil potatoes till done. Drain, reserving liquid. Mash potatoes, return liquid to pan. Add salt and pepper to taste. In another pan, melt butter, add flour and brown till golden, stirring. Add to potato mixture. Bring to boil, stirring, till thick. Place 1/3 c. cheese in each of 4 bowls. Pour potato mixture over cheese. Sprinkle on 1 tbs. diced onion. Serves 4.  

Comfort food deluxe! 

Tonight, we’re going to have:

POTATO CARROT SOUP
4 tbs. butter
1 medium chopped onion
1 minced clove garlic
2 stalks celery (I never have celery because we don’t grow it, so I don’t worry about this)
2 sliced carrots
2 diced potatoes
1 can chicken broth or 2 c. (I make my own broth – more on that some other time)
1 ½ - 2 c. milk
½ tsp. each salt and thyme
¼ tsp. freshly ground pepper

Cook onion, garlic, celery and carrots in butter in large saucepan about 5 minutes. Stir in potatoes, chicken broth and thyme. Simmer 10 minutes or until potatoes are tender. Puree. Return to pan. Add milk, salt and pepper.

I had a few green beans from when I picked veggies this morning, so I steamed them while the potatoes, etc. were cooking. I added them when I added the milk. That way, my husband didn’t think we were having a blended soup. I like them, he doesn’t. Blended soups, that is. So we compromise.


Friday, August 26, 2011


When we planted our tree rows for soil and moisture conservation, I knew we had to have a row of chokecherries. Chokecherries are found in most of the United States except for the southern states. They are small, extremely tart, and you pick them in mid to late August when the sun is beating down on you because the bushes aren’t tall enough for shade and your hands get all purple and sticky. That’s the downside.

The upside is how your kitchen smells when you wash the chokecherries, put them in a saucepan, cover with water, and cook them till they’re soft to release the juice. One of the absolutely most wonderful smells of the summer. Truly.

In olden times, Native Americans used chokecherries to make some kinds of pemmican. They didn’t have sugar. Instead of sugar, they mixed buffalo or elk, fat, and dried pounded chokecherries together, dried the mixture and had a food staple that lasted several weeks.

For our family, every summer, I make chokecherry syrup and chokecherry jelly. It’s a beautiful dark purple jelly and heavenly on toast. This year, however, I thought that there ought to be something else I could do with the buckets of chokecherries I picked. Since pemmican is out, I experimented with a chokecherry reduction sauce for pork, chicken or wild game. This is what I came up with. We were tempted to eat just the sauce without the meat, but we put the meat under it anyway to get the sauce into our mouths.

CHOKECHERRY REDUCTION
About 2 c. chokecherries
In a saucepan, just cover with water, bring to boil, simmer about 15 minutes. Mash occasionally with potato masher. Strain through several layers of cheesecloth. Should yield about 1 c. juice or a bit more.

In small frying pan:
1 tbs. olive oil
1 minced clove garlic
About ¼ c. chopped onion
Sauté 5 minutes.
Add ½ c. strained chokecherry juice
1 tbs. balsamic vinegar
1 tbs. minced fresh rosemary
Cook and stir 10-15 minutes till liquid is reduced. I would double this for more than 3 people.

If you want to try chokecherry jelly, this is Grandma’s recipe and is still the best ever.

CHOKECHERRY JELLY
Chokecherries – lots or at least 4 cups
½ c. lemon juice
Water to cover chokecherries
4 ½ c. sugar
1 pkg. pectin
Wash chokecherries. In large kettle, add water and chokecherries. Simmer till they lose most of their color. Mash with potato masher and inhale the fumes. Remove from heat. Inhale again. Strain through a strainer, throw out the seeds. Strain again through cheesecloth. Then, I like clear jelly, so I strain again through a clean flour sack dishtowel. You’ll have to throw that out too unless you like dirty purple dish towels even after washing them. Back to the jelly: measure 3 c. juice and add lemon juice. Add pectin, stir, and bring to full boil. Add sugar, bring to full boil and boil hard 1-2 minutes. One minute if you like a tender jelly. Two minutes if you like it to be pretty firm. Remove from heat, skim, ladle into sterile jars. Process in a boiling water bath 10 minutes. Eat it in the winter when you long for a taste of summertime. Eat some now too.


Thursday, August 25, 2011

First Blog Ever

I like to eat locally grown food so I'm a gardener. I'm a cook. This time of year, the two always go together. I'm also a gardener in Wyoming, and that can be a challenge on the high, dry, cold, windy plains. Here's a summary of what I've done this year.
In February, I read seed catalogs like they were The Help (favorite novel at the time). We've been gardening at our current house in Cheyenne for 13 years now. Back then, we built several raised beds, built a giant compost bin, ran water (a necessity in this climate) to as many areas as we could, varmint-proofed the garden area (turned out we didn't need to - for some reason, the rabbits leave the garden alone), tilled up an old dirt pile, got a load of sheep manure, and started gardening.
We tried a variety of vegetables and are learning what works best in this area. Remember, the wind blows here - it blows soft, and it blows hard, and it blows in-between. But it blows pretty much all the time. So we have to choose plants and areas that can withstand the gale.
When the seeds arrive, I spend a happy few hours, sorting the packages into little categories - plant these first, plant these in this bed, plant these for color, and start these in the house.
We have a grow light and a nice sunny room. I spent another happy day in March planting tomatoes, basil and peppers. Lots and lots and lots of each. I don't know when to stop. The sunroom looks like a greenhouse nightmare by mid May. Or like local law enforcement should check what's under the grow lights.
Anyway, in Cheyenne, it starts to warm up about mid-May. It's too early to plant tomatoes, but time to plant lettuce, carrots, peas, onions and spinach. We tried edible landscaping raised beds this year, and they are beautiful! Here's what one looks like in late August:
We plant beans, corn, squash, cucumbers the first of June. We plant the tomatoes and peppers about a week after that. I'll write more about each one and how successful things are, but the Blueberry-Strawberry Honey Jam is about ready. I found the basic recipe online, tweaked it a bit and it's delicious!
Blueberry-Strawberry Honey Jam
4 lbs. or 11 cups of berries
2 1/2 c. honey (I use local honey that I buy from a friend in Cheyenne)
zest from 1 lemon
juice from 1 lemon
Put the berries in a large saucepan with the rest of the ingredients. Bring to a boil, mash occasionally with a potato masher, simmer for a long time. This surprised me - the length of time this takes - about 1 1/2 - 2 hours. Meantime, wash jelly jars and lids in the dishwasher or boil for 10 minutes in a boiling water bath. Cook and stir the jam till it "sheets" off a spoon. Ladle into sterile jelly jars, cover with sterile lids, then process in boiling water bath for 10 minutes. Make sure the lids seal when you get them out of the water bath. If a lid doesn't seal, just refrigerate that jar and use it soon. As soon as you can get some bread into the toaster.