

The turkey was, as usual, the star of the show, but everything was just delicious. This year, we decided to try a free-range turkey from our local natural food store. It was very flavorful, a little chewier than a standard store-bought bird. The gravy was fabulous, so I will definitely buy another free-range turkey if I have the opportunity.

We have also found that brining the turkey is a must. It makes it moist, flavorful, and improves any kind of turkey. Both the brine and turkey recipes come from Pioneer Woman website. They are the best I’ve found. I’ll recreate it here, but check out her site too.
This is best made the night before so it has time to really cool. After you make it, refrigerate it until the next day.
Turkey Brine
3 cups Apple Juice Or Apple Cider
2 gallons Cold Water
4 Tablespoons Fresh Rosemary Leaves
5 cloves Garlic, Minced
1-½ cup Kosher Salt
2 cups Brown Sugar
3 Tablespoons Peppercorns
5 whole Bay Leaves
Peel Of Three Large Oranges
Combine all ingredients in a large pot. Bring to a boil. Stir until salt and sugar dissolve, then turn off heat and cover.


The ice will keep it cold until you are ready to cook the turkey. Put the cooler somewhere it won’t get too warm – we put it in the garage because it’s November here and cold. Check every so often to make sure the ice hasn’t melted. Turn the turkey halfway through the process to make sure everything can soak up brine.
When ready to roast the turkey, remove turkey from brine. Submerge the turkey in a pot or sink of fresh, cold water. Allow to sit in clean water for 15 minutes to remove excess salt from the outside.
Discard brine. Remove turkey from clean water, pat dry, and cook according to your normal roasting method. Which should be:
TURKEY
We’ve also found that a cooler works great for thawing the turkey. It takes about two days and there is still ice in the cavity when I wash it out before I start the brine.

After the turkey has slurped up all of the wonderful flavor of the brine for 16-24 hours remove it from the brining bag and rinse the turkey thoroughly as described.
You can stuff the bird if you prefer – I add a little stuffing to the body cavity just so we have some stuffing that was cooked in the turkey. But it does add to the cooking time, so make allowances for that.
Now tuck the legs and wings however you like to tuck them and place bird, breast side up on a rack in a large roasting pan.
You can slip some roasted garlic under the skin of the breast at this point.
 |
| I like to cover the sides with foil - it makes for easier cleanup. |

 |
| Looks creepy, huh? Slip your fingers under the skin to loosen it before you slip in the garlic. |

Cover the turkey tightly with heavy-duty foil. Make sure it is entirely covered (cover over the bottom edges of the pan.

Place in a pre-heated 275° oven and walk away. The rule of thumb now is to roast the turkey at 275° for about 10 minutes per pound. So for a 20-pound turkey, roast it at 275° for about 3 ½ hours. (For a 15-pound turkey, roast it for 2 ½ hours.) Note: there’ll still be more cooking time after this, but it’ll be at a different temperature).

Place in a pre-heated 275° oven and walk away. The rule of thumb now is to roast the turkey at 275° for about 10 minutes per pound. So for a 20-pound turkey, roast it at 275° for about 3 ½ hours. (For a 15-pound turkey, roast it for 2 ½ hours.) Note: there’ll still be more cooking time after this, but it’ll be at a different temperature).
When it’s time to take off the foil, melt one stick of butter in a bowl.
 Remove the turkey from the oven and increase the temperature to 375°. Remove the aluminum foil and set aside. Brush 1/3 of the butter all over the skin of the turkey.
Insert a meat thermometer into the thigh, near the hip joint. Place the turkey uncovered back into the oven. Continue roasting the turkey, basting with butter every 30 minutes until the thermometer registers 170° and until the juices are no longer pink. If it starts to get too brown, just put a piece of foil on top of the brown part.


Insert a meat thermometer into the thigh, near the hip joint. Place the turkey uncovered back into the oven. Continue roasting the turkey, basting with butter every 30 minutes until the thermometer registers 170° and until the juices are no longer pink. If it starts to get too brown, just put a piece of foil on top of the brown part.
Remove from oven, take it out of the roasting pan and place the turkey on a baking sheet. Cover with foil for at least 15 minutes, until you are ready to carve and serve it.
 |
| In all the hurry to get the turkey on the table, I forgot to take a picture of the finished bird. Trust me, it was gorgeous and delicious! This platter has been in Walt's family for a couple generations. So pretty! |
This is, hands-down, the best turkey gravy I’ve ever had.
GRAVY
The day before, when you pull the neck and bag of organs out of the turkey, save them! As a side note: usually those nasty looking innards are sort of a grayish brown color. On this free-range turkey, they were big and bright red. They looked like real innards.
Anyway, you need to rinse them, then put them in a small saucepan. Cover them with water, then bring to a boil and cook for about fifteen minutes, or until cooked thoroughly. After they’re cooked, turn off the heat and set aside. You can put them in the refrigerator if you do this the day before. We’ll need them (and the water) later. Or, if you don’t use them for the gravy, put them in your stock pot when you make turkey stock.
After you take the turkey out of the roasting pan, what’s left is the flavor. Pour all the drippings into a separate container. Let it sit there and separate for awhile.
Leave all the little bits in the roasting pan. This is what makes the gravy wonderful. Now, set the roasting pan on the stove (I use two burners) and turn it on low heat.
Once the fat has separated from the drippings, skim it off the top. This takes a steady hand and a bit of time, but it’s worth it. Put the fat in a separate bowl, and put some of the fat back into the roasting pan. I determine how much of the drippings are left – usually 1 ½ to 2 cups of drippings. So I use ¼ c. fat per 1 cup of drippings.
Now take equal parts of flour to fat. In other words, if you have 2 cups of drippings left after you skim the fat off, add ½ c. fat to the roasting pan. Then sprinkle ½ c. flour into the pan.
With a whisk, stir the flour into the fat, scraping up all the bits from the bottom of the pan as you go.
Keep stirring until combined. You want it to be pasty (more floury than greasy), but still stirrable.
If you add too much flour and it gets cakey and dry, just add in another tablespoon of fat.
Cook the roux (fat/flour combo) over low heat until the color of the brown deepens, about 4 or 5 minutes.
Now, get 1 can of LOW SODIUM chicken broth per 1 cup of drippings. Or you can use your own turkey or chicken stock.
With the heat still on, pour the chicken broth into the pan, whisking as you go. Work quickly to get all the roux mixed in with the liquid.
Add in about 1 cup or so of the turkey drippings (not the fat—the drippings.) I try to use all the drippings – so what if you have too much gravy. I don’t think there’s any such thing as too much.
Now whisk it in and stir as the gravy thoroughly warms and thickens. This stage of the gravy is very important; it has to cook for several minutes or more in order to thicken and reach the desired consistency. This is a very organic process and not difficult at all if you have a few tricks up your sleeve.
First, if the gravy gets too thick too soon, you can always thin it a bit with a little giblet water. It’s flavorful without being salty. This is where the giblet water comes in handy. If you choose not to cook the giblets, you can use more chicken broth or stock.

What if the gravy cooks and cooks but remains too thin? Just mix 2 or 3 tablespoons of flour with enough cold water to make it stirrable, and stir it in. Slowly, the gravy will begin to thicken.
And don’t forget the black pepper—add as much as you want!
You actually want to make the cornbread at least one day before; two days is better.
Corn breAD FOR THE STUFFING
1½ cups all-purpose flour
1½ cups cornmeal
1 tablespoon baking powder
2 tablespoons granulated sugar
1 teaspoon salt
1/3 cup corn oil or melted butter
1 cup light sour cream
1 cup 2 percent milk
1 egg, lightly beaten


Mix oil, sour cream, milk, and egg. Pour into dry ingredients. Stir just until mixed. Pour into a 9x13” pan coated with cooking spray.

Bake at 375° for 25-30 minutes. Let cool for 10 minutes. Cut into cubes.


Spread on a baking sheet.

Cover with a towel and let dry for at least 24 hours.

This is NOT how I make cornbread for normal consumption. Instead, I use butter, not oil, and melt it in a cast iron skillet. I pour most of the butter into the cornbread batter before baking and make sure the skillet is hot before I pour in the batter. Then you get a nice, buttery crispy edge to the cornbread.
 |
| The last of our garden onions - they sacrificed themselves for our Thanksgiving table. |
Now for the stuffing. I did caramelize the onions the day before to save some time Thanksgiving morning.
Caramelized Onion and Cornbread Stuffing
2 tablespoons butter
2 onions, chopped
Celery, 3 stalks chopped
1 recipe Cornbread, cubed
Handful fresh sage leaves, chopped
1 egg
1/4 c. heavy cream
1/4 c. chicken or turkey stock
Salt and freshly ground black pepper


Add sage and scrape into a large mixing bowl. Add the cornbread pieces, season well with salt and pepper, and give it a good toss until it's well combined.

In a separate bowl, whisk together the egg, cream, and stock, and pour that over the cornbread. Add more stock if you like moister stuffing. Stir the stuffing together and stuff the cavity of the turkey if desired. You could also spoon it into a buttered baking dish and put it in the oven at 375 °. Bake until hot and crusty on top, about 30 minutes.

You will need this if you want to add it to the mashed potatoes and/or the turkey:
ROAST GARLIC
ROAST GARLIC
Peel away as much of the papery skin from the garlic head as you can.

Cut off the top to expose most of the individual cloves.

Place on a piece of aluminum foil. Drizzle with olive oil. Roast (I use the toaster oven) at 400° for 30-35 minutes till the cloves feel soft.

Let cool. Just pop each clove out of its individual pocket.

At this point, you’ll be tempted to spread this on a piece of toast and eat it. But we’re going to use it in the mashed potatoes and under the turkey skin.
Make these the day before to make Thanksgiving Day a lot easier! Again, this is Ree Drummond’s recipe and are the best mashed potatoes ever. Walt describes these as potato-flavored mashed butter.
Creamy Mashed Potatoes
5 pounds Russet Or Yukon Gold Potatoes
¾ cups Butter
1 package (8 Oz.) Cream Cheese or Neufchatel, Softened
Roasted garlic
½ cups (to 3/4 Cups) Half-and-Half (I used low fat half and half)
½ teaspoons (to 1 Teaspoon) Lawry's Seasoned Salt
½ teaspoons (to 1 Teaspoon) Black Pepper


Peel and cut the potatoes into pieces that are generally the same size.

Bring a large pot of water to a simmer and add the potatoes. Bring to a boil and cook for 30 to 35 minutes. When they’re cooked through, the fork should easily slide into the potatoes with no resistance, and the potatoes should almost, but not totally, fall apart.

Bring a large pot of water to a simmer and add the potatoes. Bring to a boil and cook for 30 to 35 minutes. When they’re cooked through, the fork should easily slide into the potatoes with no resistance, and the potatoes should almost, but not totally, fall apart.
Drain the potatoes in a large colander. When the potatoes have finished draining, place them back into the dry pot and put the pot on the stove. Don’t whip these with a mixer, but mash the potatoes over low heat, allowing all the steam to escape, before adding in all the other ingredients.

Turn off the stove and add 1 ½ sticks of butter, an 8-ounce package of cream cheese, some roasted garlic and about ½ cup of half-and-half.

Mash, mash, mash! Next, add about ½ teaspoon of Lawry’s Seasoning Salt and ½ a teaspoon of black pepper.

Mash, mash, mash! Next, add about ½ teaspoon of Lawry’s Seasoning Salt and ½ a teaspoon of black pepper.

Stir well and place in a buttered medium-sized baking dish. Throw a few pats of butter over the top of the potatoes.


At this point, you can cover them and put them in the refrigerator, or you can place them in a 350° oven and heat until butter is melted and potatoes are warmed through, about 45 minutes.

Note: If you make this dish a day or two in advance, take it out of the refrigerator about 2 to 3 hours before serving time, then bake it at 350°.
I didn’t actually make these because we had so many side dishes, but they sounded so good, I’ll just include them in the recipes.
CARAMELIZED CARROTS AND ONIONS
Carrots, peeled and cut into long chunks
3 tbs. butter
1 tbs. olive oil
8 red onions, peeled and quartered
3 sprigs thyme
1 tbs. brown sugar
3 tbs. chicken stock
1 tbs. balsamic vinegar
Blanch carrots in a pan of boiling salted water for 3 minutes, drain well, then pat dry. In a large pan, melt the butter and oil, then fry the carrots, onions and thyme over a low heat for 30 minutes until golden.
Stir in the sugar and chicken stock. Add the vinegar, then continue to cook until syrupy, about 5 minutes. Remove the sprigs of thyme and serve. Make up to 2 days ahead, stored in a covered container. Reheat before serving.
You need something green on the plate to make it pretty – brussel sprouts or broccoli or spinach. This year, Jenny made green beans and they were delicious!
CARAMELIZED GREEN BEANS
2/3 c. thinly sliced shallots
½ tsp. salt
1½ lbs. trimmed fresh green beans
¼ tsp. freshly ground black pepper
1 tbsp. olive oil
1 tbsp. fresh lemon juice5 thinly sliced garlic cloves


Combine shallots and green beans on a jelly-roll pan coated with cooking spray.

Drizzle with olive oil; toss to coat. Bake at 450° for 10 minutes. Add garlic cloves; toss to combine. Bake at 450° for 10 minutes or until green beans are lightly browned. Sprinkle with salt and pepper; drizzle with lemon juice. Serves 6-8.

Drizzle with olive oil; toss to coat. Bake at 450° for 10 minutes. Add garlic cloves; toss to combine. Bake at 450° for 10 minutes or until green beans are lightly browned. Sprinkle with salt and pepper; drizzle with lemon juice. Serves 6-8.

The same goes for a yellow vegetable on your plate. I know it’s tradition to have sweet potatoes, but this is a really nice twist on a squash dish:
Butternut Squash with Wilted Spinach and Blue Cheese
1/4 cup blue cheese crumbles (or feta or gorgonzola)
3 tablespoons lemon juice
Salt and ground black pepper to taste
1 ½ teaspoons extra virgin olive oil
½ small red onion, thinly sliced
1 (5-ounce) package baby spinach
4 cups cubed and roasted butternut squash, warmed (cook this the day before also)


Use a fork to mash together blue cheese and lemon juice in a large bowl to make a thick smooth dressing. Season with salt and pepper; set aside. Heat oil in a large skillet over medium-high heat. Add onions, salt and pepper, and cook, stirring occasionally, until golden brown, about 5 minutes.

Add spinach and cook, tossing often, until slightly wilted and warm, 1 to 2 minutes more.

Add spinach and cook, tossing often, until slightly wilted and warm, 1 to 2 minutes more.
Transfer contents of skillet to bowl with dressing, add squash, salt and pepper and toss to combine.


You need rolls because how else can you get the jelly into your mouth?
SWEET POTATO CRESCENT ROLLS
1 c. (or 1½ c.) sweet potatoes (cooked and mashed) (Jenny used pumpkin/squash)
1 c. milk
¼ c. butter
Combine in large saucepan; cook over medium heat, stirring until butter is melted and mixture is warm.

1½ c. whole wheat bread flour (or 1 c. white bread flour, ½ c. whole-wheat flour)
¼ c. sugar (or less)
1 tbsp. active dry yeast
1 tsp. salt
2 tsp. pumpkin pie spice
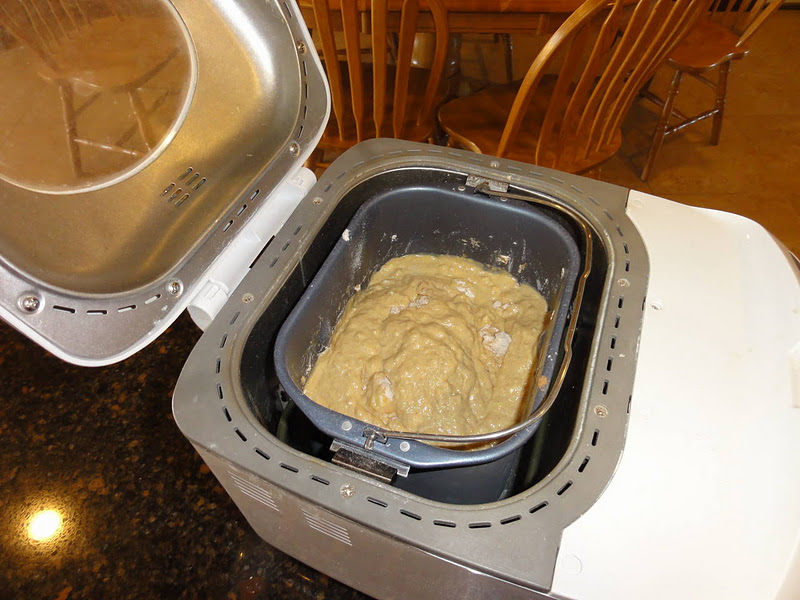
Combine in a large bowl. Add sweet potato or pumpkin mixture to flour mixture; beat with mixer set on low speed, scraping bowl often, until mixture is all moistened, 1-2 minutes. Add 1 large egg; mix at medium speed for 3 minutes. Then add 2 – 2½ c. bread flour (or 1 c. white, 1½ c. wheat); stir in enough flour by hand to make dough easy to handle. Turn onto floured surface and knead until smooth and elastic, about 7- 9 minutes.

Place in greased bowl, turn to grease both sides, cover with a damp cloth, and let rise until doubled in bulk. Punch down dough and divide it in half. Roll each half of dough on lightly floured surface into a 12-inch circle. Brush each circle with 1 tbsp. melted butter.
Place in greased bowl, turn to grease both sides, cover with a damp cloth, and let rise until doubled in bulk. Punch down dough and divide it in half. Roll each half of dough on lightly floured surface into a 12-inch circle. Brush each circle with 1 tbsp. melted butter.
Cut into 6 wedges each (12 total) and tightly roll up each wedge from wide end to point. Place crescent rolls, point-side down, on greased baking sheet. Cover and let rise until doubled. Bake in preheated oven at 375° until golden brown, 12-15 min. Makes 12 rolls.
Actually, we formed the rolls into balls, put them in a greased baking pan, brushed them with butter and followed the baking instructions.

Finally, cook that Cranberry Salsa/Sauce, from the previous blog, until the cranberries are soft, and serve with the turkey.

This was a great Thanksgiving meal! Next – The Desserts. Yum!
No comments:
Post a Comment