Everyone should have a signature dish – a cake your mother made, that salad Aunt Carol made for the holidays, a pie that Grammy made. Well, mine is this bread. I even won a blue ribbon for it years ago at the Campbell County Fair. And I’ve tweaked the recipe since then – more whole wheat and flax and sourdough. I used to make it every week when the kids were still at home. It makes six loaves – one to give away, one to eat as soon as the bread comes out of the oven, and four to last the rest of the week.
KIM’S REGULAR OL’ BREAD
Soften 2 tbs. yeast in ½ c. warm water in large bowl or bread mixer for 10 minutes
Optional: add 1 c. sourdough start
About 4-5 c. white flour
4-5 c. whole wheat flour
1 c. oats
½ c. flax seed
1/3 c. shortening
3 ½ c. warm water
2/3 c. brown sugar
1 tsp. salt
Optional: leftover pumpkin/squash puree – about a cup (this makes a pretty, sort of golden, loaf of bread)
While yeast is softening, melt shortening. Add warm water, brown sugar, and salt to shortening. Stir.
Add to yeast: water mixture, sourdough, oats, flax seed and pumpkin.
Add 4 c. white flour. Beat for 2 minutes. Let proof for 15 minutes.
Add whole wheat flour and enough flour to make a soft/medium dough.
Knead 6-8 minutes by machine or 10 minutes by hand. Place in greased bowl and turn to grease top.
 |
| The floor of the sunroom is nice and warm. |
Let rise 1 ½ hours.
Punch down and divide into 6 portions.
Grease pans (I use melted butter), form loaves, brush with butter.
 |
| Roll out dough portion about as wide as your pan is long. |
 |
| Then roll it up like cinnamon rolls. Place seam side down in the pan. |
 |
| Brush each loaf with butter |
Let rise ½ hour, bake at 375° for 30 minutes.
When you take them out of the oven, you can brush with any leftover melted butter.
Cool 10 minutes, remove from pans. 6 loaves. Freeze the ones you aren’t going to use in the next day or so.
After you brush the tops with butter before they are baked, you can sprinkle on whole oats, whole flax seed, sesame seeds, sunflower seeds.
Or you can brush with butter when forming loaves and sprinkle with cinnamon-sugar and roll up like cinnamon rolls for a breakfast loaf of cinnamon bread.
What’s “proof”? This is just the step where you allow the yeast to work its magic for 15 or 20 minutes.
I make this ciabatta a lot in the summer – it’s nice for a quick supper of marinara, pasta and salad.
CIABATTA
1 ½ tsp. active dry yeast
½ c. lukewarm water
2 c. ice water (really)
1 c. sourdough start
About 6 c. flour – use whatever proportion of white/whole wheat you prefer
1 tbs. salt (I usually cut this in half)
Optional – rosemary, thyme, basil
It helps to do this with a bread mixer, but you can do it by hand also.
 |
| My bread mixer - it was my grandmother's, then my mom's, now mine. It's probably about 40 years old and still works great. |
Dissolve yeast in warm water. Let stand 5 minutes. Add sourdough start, ice water and 5 cups flour. Stir or mix 1 minute. Add the salt and stir or mix 2 minutes. Let the dough rest, or proof, for 20 minutes. At this point, the dough will look soupy.
Knead the dough with a bread mixer for 6 minutes, adding flour a tablespoon at a time to make a very soft, almost doughy, mixture. Or knead by hand for 10 minutes on a floured surface. Add any herbs at this time.
Place the dough in a well oiled bowl, turn to grease the top. Cover with a clean towel or plastic wrap and let rise 2 ½ hours (this is great because you can get other things done). You want it to rise slowly because this bread has such a nice yeasty flavor.
Pour the dough on a floured surface.
Divide in half, thirds or quarters – I usually do thirds because that’s a big enough loaf for two of us. Gently and quickly form into a ball or loaf – you don’t want to work the dough too much at this time.
Put the loaves on a bread peel sprinkled with cornmeal.
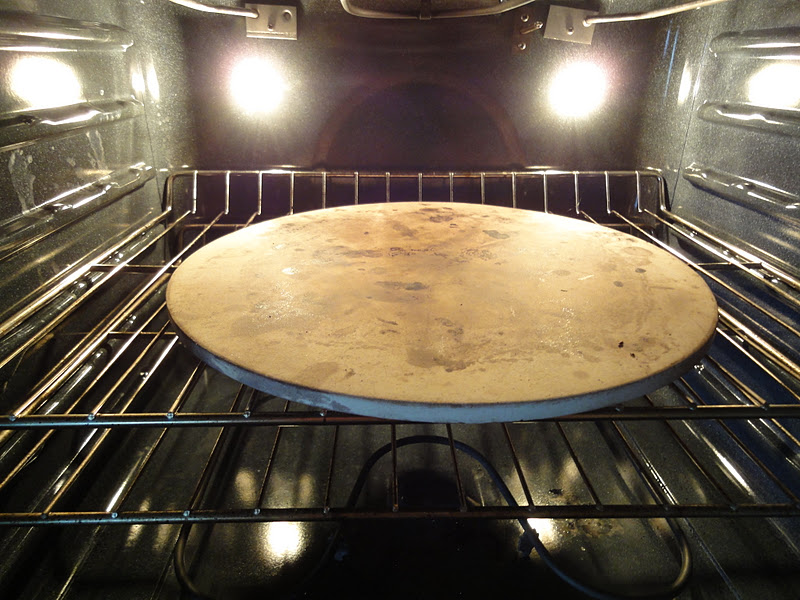
Cover and let rise another 2 hours (now you can read a book or something). You can sprinkle additional herbs or seeds on the top of the loaves. Fifteen minutes before you bake the loaves, place a baking stone in the oven on the top shelf.
Heat the oven to 450°. Get a pie plate or 8x8” pan and fill the bottom with ice cubes. This is what will make the loaf nice and crusty. You can also mist the baking stone with sprayed water, but I prefer the ice.
Slide the loaf onto the baking stone, place the pan with ice cubes on the bottom shelf. Bake 20-30 minutes depending on the size of your loaves – you want the crust to be a dark golden brown.
Remove from the oven; bake any additional loaves – adding a new pan of ice each time. Let loaves cool at least 30 minutes before slicing. The extra loaves can also be frozen.
Rosemary Lemon No-Knead Bread
This bread is almost effortless to make because it requires no kneading. Instead, the dough is allowed to slowly rise over a long period of time. Then it is baked in a preheated covered cast-iron pot, which helps produce a crispy, bakery-style crust on the finished loaf.
3 cups all-purpose flour
1/4 tsp. active dry yeast
1 tsp. salt
2 tsp. chopped fresh rosemary
2 tsp. chopped lemon zest (or finely grated from one lemon)
Cornmeal as needed
In a large bowl, combine the flour, yeast, salt, rosemary and zest. Add 1 5/8 cups water and stir until blended; the dough will be shaggy and very sticky. Cover the bowl with plastic wrap. Let the dough rest at warm room temperature (about 70°) until the surface is dotted with bubbles, 12 to 18 hours.
Place the dough on a lightly floured work surface. Sprinkle the dough with a little flour and fold the dough over onto itself once or twice. Cover loosely with plastic wrap and let rest for 15 minutes.
Using just enough flour to keep the dough from sticking to the work surface or your fingers, gently and quickly shape the dough into a ball. Generously coat a cotton towel, preferably a flour sack towel (not terry cloth), with cornmeal. Put the dough, seam side down, on the towel and dust with more flour or cornmeal. Cover with another cotton towel and let rise until the dough is more than double in size and does not readily spring back when poked with a finger, about 2 hours.
At least 30 minutes before the dough is ready, put a 2 3/4-quart cast-iron pot in the oven and preheat the oven to 450°.
Carefully remove the pot from the oven. Slide your hand under the towel and turn the dough over, seam side up, into the pot; it may look like a mess, but that is OK. Shake the pan once or twice if the dough is unevenly distributed; it will straighten out as it bakes. Cover with the lid and bake for 30 minutes. Uncover and continue baking until the loaf is browned, 15 to 30 minutes more.
Transfer the pot to a wire rack and let cool for 10 minutes. Using oven mitts, turn the pot on its side and gently turn the bread; it will release easily. Makes one 1 1/2-lb. loaf.
I guess a word about sourdough starter is needed here. I got my start from a friend about 30 years ago. She told me the original start came across the plains with an ancestor and was passed down from mother to daughter until it got to her. This is how women used to bake bread because they didn’t always have yeast. And sourdough pancakes are the lightest tastiest things ever.
Anyway, if you want a start of your own:
SOURDOUGH START
3 c. warm water
1 ½ tbs. yeast
1 tsp. sugar
3 c. white flour
Mix this together in a stainless steel or glass bowl, cover with plastic wrap. Place in a warm, draft-free area and let sit for 8-12 hours. It should be bubbly and smell, well, sour. But nice.
Use what you want, but you have to feed this to keep it going. Each time you use it, reserve at least ¼ c. of start and replace the amount you used. So if you used a cup of start, whisk together 1 c. flour and 1 c. warm water and add to the starter. Stir well.
I keep mine in a quart glass jar and cover with plastic wrap. Don’t put a lid on it or you will have an interesting science experiment on explosions in your refrigerator. I use mine about every other week, but sometimes it’s longer than that. If I don’t have time to bake, I pour a little of the start out, and add some more flour and warm water. Another cool thing about sourdough is that the yeast it needs actually lives in the air around you. So your starter will be different from mine depending on the flour you use and where you live.
Later, I’ll do a blog on some sourdough recipes other than bread. Get your start ready because you can’t believe the brownies you can make.
Okay, back to bread.
SOURDOUGH BREAD
2 c. flour – white, whole wheat or a mixture
1 ½ c. sourdough start
¾ tsp. salt
This was easy, easy. Put the sourdough start in a bowl. Add enough flour to make a medium/soft dough. Add the salt.
Stir until the flour is incorporated, then knead on a floured surface or in the bowl.
Place in an oiled bowl, then turn to grease the top.
Let rise in a warm spot until doubled in size. This might take a few hours because there is no dry yeast in the recipe.
 |
| It's also warm by the wood stove. |
Turn out onto a floured surface and shape into a round or oblong loaf. Place on a baking peel and let rise another 2 hours or so.
Just before baking, take very sharp knife, cut an X – if a round loaf – or slashes – if an oblong loaf.
Put a baking stone in the oven and heat to 400°. Put a pan of ice cubes (like in the ciabatta recipe) on the bottom rack and slide the loaf on the baking stone, or you can use a baking sheet dusted with cornmeal. Bake about 45 minutes until dark golden brown. Cool about 30 minutes, if you can wait that long.
Bread is home. The smell of fresh bread says “welcome home” to anyone walking in your door. I saw a show on TV recently that focused on baking bread. The lady who hosted the show said that, when her bread comes out of the oven, she has some butter and honey butter and jam or jelly ready. Then, when the loaf is just cool enough, everyone gets to tear it apart and put toppings on the pieces and eat it while it’s still warm. Sounds like a lovely tradition to me.